Merry ChristMess!

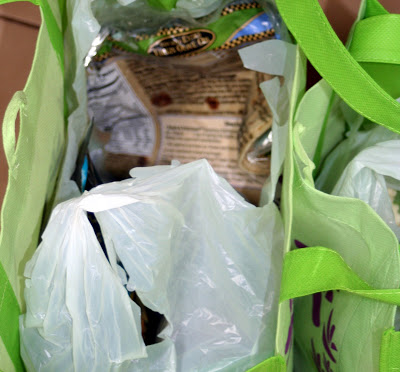
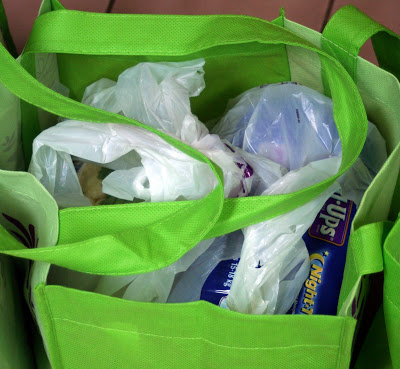
My children have had three Christmases. They had a lovely one at home and then one with each set of grandparents. With every gift comes a new mess! The paper, the tags, the strings, the cardboard, the plastic, the twist ties, the shreds of everything that show up for days to come no matter how many times you've run the vacuum through the house. I have three children and we are officially overrun with toys. I told the children yesterday that they each need to find 10 toys that have not been used to donate. (I'm aiming for 15 ... I know I will have to pull a few on the sly!) I hate mess. I hate clutter and I hate chaos. I believe in throwing 10 things away every day - even if just 10 pieces of paper. I am not a packrat - though I was as a child and I tend to purge more than I hoard. We have a nice sized home and yet I feel as though, simply put, there's too much crap in here!

It's supposed to be blustery out today. And cold. So we'll load up the back of the car with unused toys that are still in good shape. If I'm lucky I may even be able to fill up a garbage bag! I won't get my hopes up too high. I'd also like to start putting some of the Christmas decorations away. See above note re my issue with clutter and chaos. However this makes the children sad. The end of the Christmas season is almost upon us. (In my opinion the season officially ends on New Year's Day.) My children will be sad. So I'll preserve their Christmas a little longer. We'll do some crafts this afternoon. We'll do some crafts using our Christmas cards. We'll craft, we'll recycle and we'll have some fun!


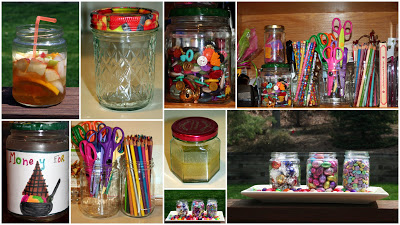
I love the idea of collecting all the cards together in a book - especially with photo cards. What a great way to watch children grow over the years!


Cut out cards to create gift tags or place settings for future Christmas place settings.


Simple cut out letters make lovely and practical gift tags.
One could also cut out the alphabet to use as flash cards for the younger set.


Festive holiday garland to be enjoyed by everyone!


Source: bhg.com via Jessica on Pinterest

Create mini trees by recycling old cards.


This is one of my favorite ideas! Take a picture of photo cards and then use the pictures to mark your contacts!


I love this as a Thank you card. I plan on cutting out these words from our existing Christmas cards and posing my kids. What a great way to send a thank you note. These can be done right from a printer at home!


Warm and Happy Holiday Wishes to you!

XOXO


Jessica

Repurposed Orangina Bottles


make a lovely home for my freshly picked hydrangea.
I love the simple and natural look of the flowers in these bottles.
I love the simple and natural in everything.
I love to recycle and repurpose what I can.

This is an effortless project. All you need are bottles or jars - such as mason, jam or pickle jars, some twine or thin rope and a hot glue gun.

I suggest you start at the bottom and let the twine follow the glue along the sides of the bottle or jar. There is no way to mess this up! So, for those of you who are not crafty or creative this is a great project for you! The end result is always spectacular!

Headed back out with my shears...

XOXO


A perfect Memory Jar

Every year we go to Maine we collect shells and rocks and beach glass along the shore. Some years we get super lucky and find a starfish or a sand dollar. This was one of those summers. Sand Dollars were in abundance and Rebecca found 4 and I found 1. The day we left Rebecca asked if I could get some sand as a souvenir before we left, so I got a Tupperware container and filled it with the wonderful Ocean Park sand.

I used to put all of Rebecca's findings in glass jars. She would display them proudly on her dresser. On the top of each jar I noted the year. I don't know where those jars disappeared to -- they must have gotten lost in the move a couple of years ago.

I decided that Rebecca would like something similar this year. I also decided to "dress it up" a bit. What resulted was our perfect Memory Jar!


I painted our shell white and using a glue gun attached the ribbon to the back... This will be our signage.


I recycled an old pickle jar (Clasusen's Sours if you must know!)
and glue-gunned (is that a verb?) a swatch of fabric to the lid...
This does cause the lid to not close firmly,
so I applied more of the hot glue to the rim of the glass jar to secure the lid well into place.


Next I filled the jar with out treasures... sand, shells, rocks, beach glass and 2 of Rebecca's Sand Dollars.

Once the treasures were safely inside the jar and the lid glued on tight, I tied the shell on as well, onto which I wrote "OPME" which stands for Ocean Park, Maine and the year.


Rebecca loves it!

Grace, Elegance and Rustic Simplicity... DIY Quickie!


Capture summer or your favorite summer memories forever! Many of you are about to embark on your final summer vacation. My kids always get a little bit sad as this time of year comes to an end. As much as they love everything about getting ready to go back to school, (the new clothes, school supplies, etc.) they are not ready to leave the long, lazy, hazy days of summer behind. Whether school has already started and you are in the South, or you are headed to the shore one more time before Labor Day, bring a Ziplock bag or two and fill it with all your beach finds! When you get back home your children can help make these wonderful luminaries.

I used Mason jars, recycled pickle jars and small bud vases for these. Rebecca helped me with this project. Simply have your child pour desired amount of sand into the jars and then add the shells (rocks are lovely too). When your child is done firmly place a tea light in the middle of the jar. Your child will delight in what they have done!

This can also be done with large hurricane vases and larger shells. Is your child having a Birthday party this summer? This might make for a great and inexpensive craft!

I love having them outside on the deck all lit up at night!


I was cleaning out my car a while back and found some twine! (I have no idea what it was doing there!) I thought it would be fun to use... might look nice if I wrapped it around some jars to create small, rustic and yet elegant vases. So I gave it a try. As many of you know I cannot sew. But I am fabulously talented with a hot glue gun!

This was the easiest project ever and I love the results it yielded! I simply wrapped the twine around the jars (I used one large pickle jar and 2 Orangina bottles -- love their shape!) and as I wrapped it around the glass I would apply a bit of hot glue to keep the twine in place. (Truth be told I chose small objects because I am lazy and wanted instant gratification! But I love the look, I may try this on a larger jar!)

This is a bit messy so where ever you work, please cover your space well and carefully. And be prepared for some very sticky fingers! Since the glue is waterproof I have no problems rinsing the bottles out. (I would not place them in the dishwasher though!) Should a strand get loose, simply glue it back into place.

These look wonderful on a small side table, on a bathroom countertop or console, or even in the middle of your kitchen table with homegrown hydrangea and really lovely with your Lilly Jubilee Juice or cocktail ;) Click here for recipe!


Our Littlest Textile Designers

NOTE: In below post I originally mentioned using either poster paints or acrylics. I meant to say use acrylic paints or fabric paints, This will not work with the poster paints. Poster paints will wash out. My appologies.


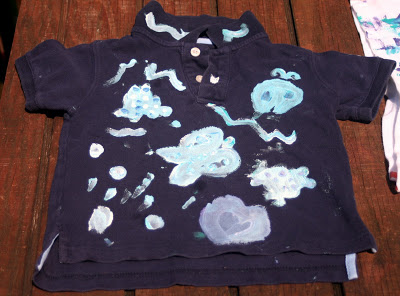
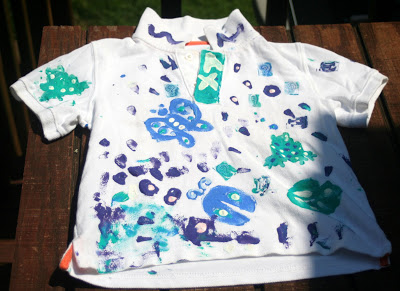
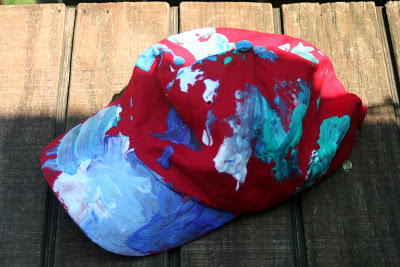
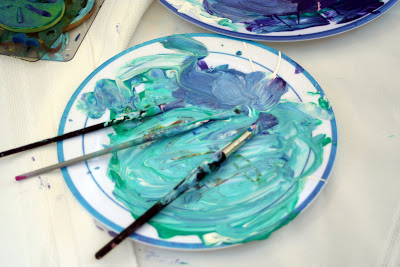
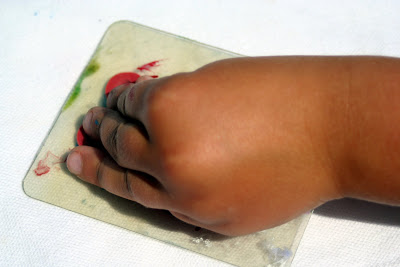
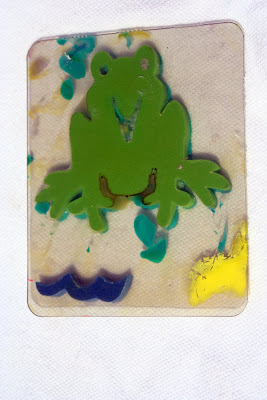
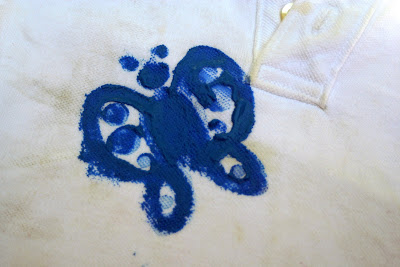
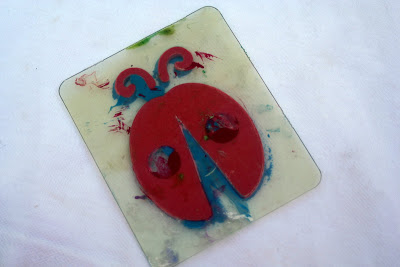
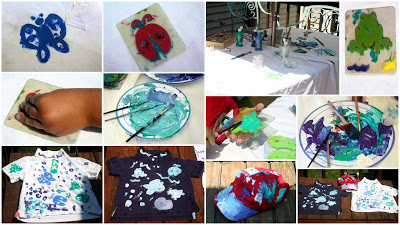
Too tired to write a lengthy post... was awakened at 4:22 am and then unable to fall back asleep. I thought it was going to be a brutally long day. But we had fun and kept busy. We made these great shirts, recycling badly stained polo shirts with paint and an iron. Alexander had a blast. After our art session I finished the mess I started the day before. After taking the kids to get new Webkinz (which might be tomorrow's post) I got started in the kitchen. For dinner we would have Grilled Pork Chops with an Asian American BBQ Sauce, Sweet Basil Rice and Cucumber Salad. Dessert was a Peach Tarte Tatin with Vanilla Ice Cream. It was Ohmygodtodiefor good!

I'm posting this in my bleary eyed state in case any of you wake up looking for something to do in the morning!


To do this you will need:
Various brushes in different sizes
Paints, various colors, acrylic or fabric
Stamps, if desired (if you would like to use a stamp but have none on hand try Allie's solution and visit No Time for Flashcards for a complete How To Guide)
Jar with water
Paper towels
Plastic or paper plates to pour and mix paints
Paint what you wish on your shirts (or whatever you are painting). If using a stamp you may need to go over the picture with another coat of paint until you achieve your desired result.

This is a project that will require a good deal of supervision from you, even when working with older children.When you have finished painting set your shirt aside to dry thoroughly. Once the paint is completely dry (you'll have to be vigilant about your younger child not glopping on the paint) Iron the entire shirt with a hot iron. The heat will set the paint in to the shirt, rendering the images permanent.

We are thrilled with the way they all came out. Rebecca's was wonderful too. I accidentally deleted it from here and I am too tired to re-upload it.

Night Night all!

Paper, Plastic or just plain Stupid?

Admittedly I have gone in to the grocery store and forgotten my recycled bags in the back of the car. I haven't exactly scooted across the parking lot to get them because (99% of the time) I am stupid enough to be grocery shopping with a 3 year old, because I am one of those who seems to never learn from her past mistakes. (Or like birthing 3 children, you seem to forget the pain... kinda sorta.)

Today I made a conscientious point to remember my bags. And almost everything on my list. Except the Old Bay. I forgot the Old Bay. It's okay, I won't be using it in the next couple of days. I had 5 bags with me. The 6th one was in the car housing spare waters and snacks for the kiddos for after school on the playground. I knew I didn't have enough bags to carry my $196 worth of groceries but it was better than nothing. I could deal with a few plastic bags. I do reuse them. I keep them in the car and use them as garbage bags so that the kid's wrappers and juice boxes don't litter the interior of the van. But they do anyhow. And despite the half dozen or so of plastic Stop & Shop bags my car greatly resembles a garbage can. Somehow wrappers still find their way on to the floor, and onto the seats and in between the seats and in all the little nooks and crannies vans seem to have these days. I have Terrible and Dirty creatures.

But when I hand the green bags over the bag-boy I really do not expect to see this in my shopping cart:


I'm thinking of writing a formal letter of complaint to Stop & Shop...

I Heart Pickle Jars!

In honor of Earth Week and Earth Day I want to share some ideas as to how we can reuse some of our recyclables as home decor items.

We go through a slew of glass jars in this house. We eat a lot of salsa, applesauce, pickles -- lots and lots and lots of pickles! Instead of tossing them all into our blue recycling bin I wash them out and put them to good use. I love these plain and simple jars. When filled with the right ingredient, I think they are beautiful. These glass jars, of all sizes and shapes are readily found in my cupboards and on my shelves in the basement.

The beautiful picture above is from A Touch of Country, a new blog I have very recently discovered. I use my mason jars non-stop during the warmer months as they are a perfect way to display cut up vegetables such as celery, carrots, cucumbers, asparagus and other light snack-able items such as pretzels, bread sticks and cheese straws. The jars are also a perfect vehicle to house your utensils for a garden party. I love how she houses all the jars in an old milk crate. Isn't it beautiful!

If plain mason jars are too simple for your style, jazz them up quickly with a simple grosgrain ribbon.

Other good uses for mason jars are:

  • Storing pencils, markers, and scissors in an office or craft room -- or as I have above my desk in the kitchen.
  • Storing buttons and other crafting items
  • Making and storing home made salad dressing (We rarely buy store bought dressings and we eat a lot of salads, so I make enough dressing to fill a jar and it serves us for a week or so.)
  • Grandma's Strawberry Jam jars get cleaned out and sent back to Grandma in anticipation of the next batch!
  • I love serving beverages in mason jars --whether it be sun tea, lemonade or even sangria. Fill the jars with ice, fresh fruit, beverage and a straw. So simple and so pretty!
  • A perfect way to present candy, and other small snacks
  • My kids turned one into an Ice Cream Jar where they dump all spare change (mostly mom and dad that they rummaged around for) so that when an ice cream craving hits we can run!
  • I have a Fun Jar filled with folded pieces of paper... Little notes on each piece of paper say things like "Let's Bake Some Cookies" or "Paint Pottery" or "A Trip to the Bookstore" or "An Ice Cream Cone for You" or "Movie Time" and other things that we like to do.
  • In the basement, next to his work bench Daddy has a bunch of baby food jars that he uses to store nuts and bolds, screws and other small items. He drilled the jars in to a piece of wood that hangs from the wall and when he needs a screw or nail all he has to do is unscrew the jar, take what he needs and place the jar back on the wall. Nifty, eh! (Though I am not certain there are many glass baby food jars there are anymore as most, unfortunately, seem to be plastic from what I have seen, these days.)
  • I use glass jars of all sizes as miniature vases. They are perfect for freshly picked outdoor flowers such as daffodils, jonquils, tulips and roses! Line several jars up together on a windowsill or use them as informal centerpieces for a springtime luncheon.

I would love to hear some of the clever ways you recycle your mason jars!

A work in progress...


A few months ago we lost a great local store called Blue Tulip. It carried everything from greeting cards, to fine soaps and lotions to handbags, dishes, glasses, stationery and party items. It was a great place to stop off to get a hostess gift, a party gift or a teacher gift as there was really something in it for everyone. When they closed they had a slew of Going Out of Business Sales. I got a few items, not many. One items I picked up was a lovely white leather Guest Book. My grandmother always had one and whenever she entertained her guests would sign the book and jot down a little lovely or two. As a child I loved to read them, decipher hand writings and signatures, stopping every now and then to ooh and ahh over a celebrity, politician or even royalty. Our guests are not as exciting but still I love the idea of having something to remember each event. The Guest Book has yet to be opened. I keep forgetting!

Another thing I picked up at the sale was an unattractive, plain cork board. It was a great size and they wanted just a few dollars for it, so I snatched it up with great dreams of doing something nice to it for Rebecca's room. I had always wanted some place to pin up things or tape things, but I was not allowed. My room was practically museum-perfect with no toys out save for an antique doll and my Snoopy on my bed. I was so envious of my friends who had their posters of Shaun Cassidy and Parker Stevenson, Scott Baio, Christopher Atkins which led the way to posters of Andrew McCarthy, Tom Cruise and Rob Lowe. Pages of Tiger Beat and Seventeen ripped out and taped onto walls. I wanted a room like that and I couldn't have one. I wanted a place to put photos of my best friends, and other collectibles like ticket stubs and the like. Now while Rebecca won't be able to tape stuff up on her walls either. No Jonas Brothers no Zac Ephron on her pretty walls. I do think a memory board would be a lovely thing for her to have.

Originally I wanted to line the cork with pretty wall paper then quickly talked myself out of that idea thinking that the paper would get destroyed too quickly. So I chose this dusty rose color to paint to cover the cork and a little bit of white, a thin green and white grosgrain ribbon that I will use across the board and a wide grosgrain ribbon in orange, pink, green and white that will cover the unattractive metal frame. I was so excited to finish up the board this evening but I couldn't locate any of my glue gun sticks. So bummed. So I will keep you posted.

The project was super easy to do. Anyone can do it!

You'll need:

One inexpensive cork board
Some paint (any color)
Wide paint brush, either bristle or foam
Ribbon -- any color and width that you like that will coordinate with the paint
Glue gun to glue ribbon around the perimeter of the frame and across the center
Thumb tacks

Place newspaper over your work surface
Apply paint over cork -- will need at least two coats as the cork absorbs a lot of the paint
Make sure brush strokes are smooth, or do as I did and create patterns with the brush
I also squeezed the paint out of the bottle in random patterns to create a 3D effect
When all had set and dried I painted circles in white over the pink -- you can create any pattern you wish. You could even use a stencil for a more polished look.
Apply ribbon with a glue gun and when dry it is ready to hang!

The kids celebrated Earth Day today at school. It was a magnificent day for it as the temperatures climbed into the 70s. The children spent most of the day outside composting and planting and making birdfeeders. They've given me some great ideas for crafting/recycling that I will post throughout the next week in honor of Earth Day!

Talk Dirty, Baby!

There is a most wonderful place for children of all ages in Stratford, Connecticut. If you happen to be on the I-95 corridor and passing through New England you must stop here. This was my third field experience to The Garbage Museum, part of the PreK-3 curriculum at my children's school. Our clever teacher loops this trip in with a lengthy lesson on the importance on recycling and precedes the study of Andy Warhol who made art from recycled items. (Think Campbell's soup cans!) Our school does what it can to help make the world a little "Greener" using fluorescent lights, buying organic, locally grown produce, meat and dairy and teaching all it's students the importance of recycling.

The Garbage Museum is a great, hands-on way to learn the importance of recycling. Adjacent to the building is a recycling center. Part of the museum is comprised of a large, windowed corridor over the actual recycling center. Twenty towns utilize this recycling center. Plastics, glass, paper, and tin are brought to this location. Oh what fun it is to watch the recyclables being sorted accordingly. The items that are unable to be recycled are sent off to the local waste station where the trash is turned into energy.

The children watched eagerly as the plastics went down a large shute on one side of the glass hallway, to rise up on a long conveyor belt on the other side where it was brought to workers who sorted, by hand, the items to be recycled. After the workers sort though everything, the plastics then get crushed by a giant machine and packaged up where eventually it will be transported to North Carolina and recycled into carpeting, or sweaters or backyard swing sets! The paper goods will get recycled into other paper goods. As you will see in the slide show, (below) every once in a while, items made their way into recycling bins that had no right to be in those bins!

At the museum the children saw the museum's 2000 pound Trash-O-Saurus, created entirely by recycled items that people had tossed into the garbage. It's quite the creation and fun to look at.

The museum is very interactive. In addition the Trash-O-Saurus the children learned about composting, saw art made from recycled items and learned that the earth will really be a happier place if everyone recycled. Sadly, the museum is in danger of being shut down due to lack of funding. I do hope that someone steps in and helps. For the most part I am not a fan of Obama's stimulus packages. But, if he could find it in his heart to keep small, special places as this alive, much as he is pumping money into the NEA, I would be happy. And so would a lot of little children. Including Alexander and his friends.

There are other similar museums across the country. You should check your local towns to see if such an activity is available to you!


The children learned that everything should be reused, reduced and recycled. Instead of throwing away items that are no longer needed, give them to someone else. Instead of throwing away your water bottle recycle it. Or reuse it. Come up with a creative use for it.

Alexander fell asleep on his way home from the museum. It's unusual for him to nap these days, but he had fun and he was exhausted. When he woke up he demanded that we reuse his orange juice bottle!

Together we made an I Spy Bottle. And he loves it and he is so excited to bring it in to school to show his teacher what we made with his recycled bottle!


You too can do this. It's simple and takes a matter of minutes. I do suggest using a bottle (or jar) with a wider mouth. (Soda or water bottles won't work so well.)

Together we found, and used the following items:

a small car
2 gum balls
1 piece of hard candy
1 crayon
1 glue stick
some odd change
a red plastic lobster
a pink eraser
a key
a few multi-colored nonpareils
a button
a green plastic clip


We placed all the items in the bottle and then we filled the bottle with uncooked rice, leaving enough room so that the rice would move enough so that we could find the items inside the bottle.

This is a great craft project to tie along with a little lesson in recycling!