Speggtacular!
Before I start I want to tell you how utterly pissed I am... I had all these How To Pictures for you with step by step photos. I downloaded then on to Picasa and somehow they are gone. All of them. Mysteriously disappeared. Even the picture of the eggs hanging from the kitchen light fixture which was pretty funny! Well, they didn't mysteriously disappear. I must have accidentally deleted them when I was cleaning out my unwanted pictures. Ugh!
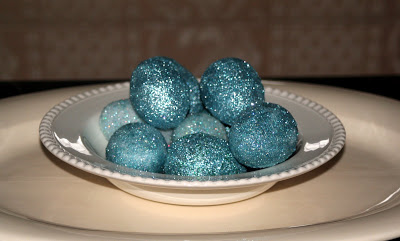
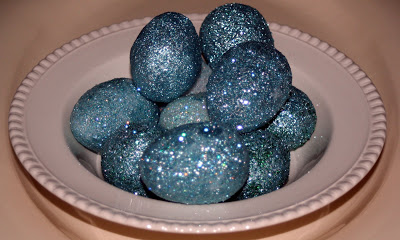
But above a pictures of the finished product and I like them so much I am going to go out and get more eggs, in more sizes and more glitter!
Alexander wanted to do a project involving glitter and I had some foam eggs I had been dying to do something with, so that's what I did.
You'll need:
foam eggs, as many as you would like, in the sizes you desire -- available at most craft stores
Craft glue such as Mod Podge
Glitter (I think Martha Stewart's is the best. It is pricier but it is superfine and therefore goes a long way. It is easier to work with and I like the result better.)
A couple of large paint brushes or foam brushes
A (plastic) bowl for the glitter
A (plastic) bowl to pour some Mod Podge
Line your workspace with newspaper, lots of newspaper! You might want some wet some wet paper towels to keep by your work area... hands get awfully sticky!
Paint the foam eggs with glue, be sure to cover all parts very well.
Roll the egg in the glitter. If you can't cover the entire egg use your hands or a spoon to sprinkle the glitter on to those areas in need. When egg is covered, give a light shake and set aside.
OR you could
Pour some of the glitter mixture directly into the glue. Mix well and paint the eggs with the glue mixture. Cover all areas well. If you choose to do this method you can eggs of varying shades of your color by changing the amounts of glitter you used. Set aside to dry. (I did both methods.)
Once all eggs have been painted you will need to hang them to dry properly without sticking. I was able to use my kitchen light fixture as the perfect hanging tool! I gathered up some push-pins and some inexpensive wrapping paper ribbon that I cut into equal pieces. I attached the ribbon to the eggs using the push pin at the top of the egg. I attached eggs to both ends of the ribbon and let them hang to dry. You could string the eggs to dry over a hanger and then hang the hanger (not near a wall or in your closet!) After a couple of hours your Speggtacular Creation should be dry!
You may want to, and I did, spray the eggs with a matte or gloss finish to help keep the glitter from overtaking your home, which it will, for the day, anyway!
Now I am off to get some more eggs and some of that shredded crinkly paper to place under them!
NB. This is a fairly messy project which requires a good bit of supervision for a younger child.