Slow + Simple :: Homemade Strawberry Jam - It's so easy to make!


The other day I shared with you my desire to make homemade bread not from a bread machine. I love homemade bread but the idea of it terrified me. It seemed so daunting! In my quest to try something new and to try my hand at those things that scare me I made the bread, with my daughter, and we couldn't believe how easy and delicious it was. A couple of weeks ago my children and I went strawberry picking. It was the the height of strawberry season in Connecticut and with the 10 pounds of fruit we brought home not only did we need strawberry recipes, but we needed recipes that would use lots of berries at once! And so it seemed that the time to try my hand at making homemade strawberry jam had come. I researched the recipes which looked easy and simple enough. I chose to use The Pioneer Woman's recipe. She had 2 very in depth, detailed and picture-heavy posts. I felt fairly safe that I could not go wrong. Well, we did! We forgot the lemon juice and I don't think we let the mixture boil quite long enough as our jam was still a tad bit liquidy - but it was fantastic nonetheless. They say that practice makes perfect and blueberry season is now upon us... Can you guess what we will be doing next week?!


What you will need:

Strawberries, 5-6 cups
Powdered Fruit Pectin (this is sold in the canning aisle of supermarkets), 6 TBS
Sugar, 7 cups
Lemon juice, 1/4 cup - We forgot the lemon juice and many recipes don't even require this
Small mason jars with lids, 8
Large canning pot
Large pot to make the jam

The Pioneer Woman suggests to get a rack to fit inside pot but we didn't have one and we were find. She also suggested to get a jar lifter. We didn't have that as well and used long tongs to pull the jars from the hot water.


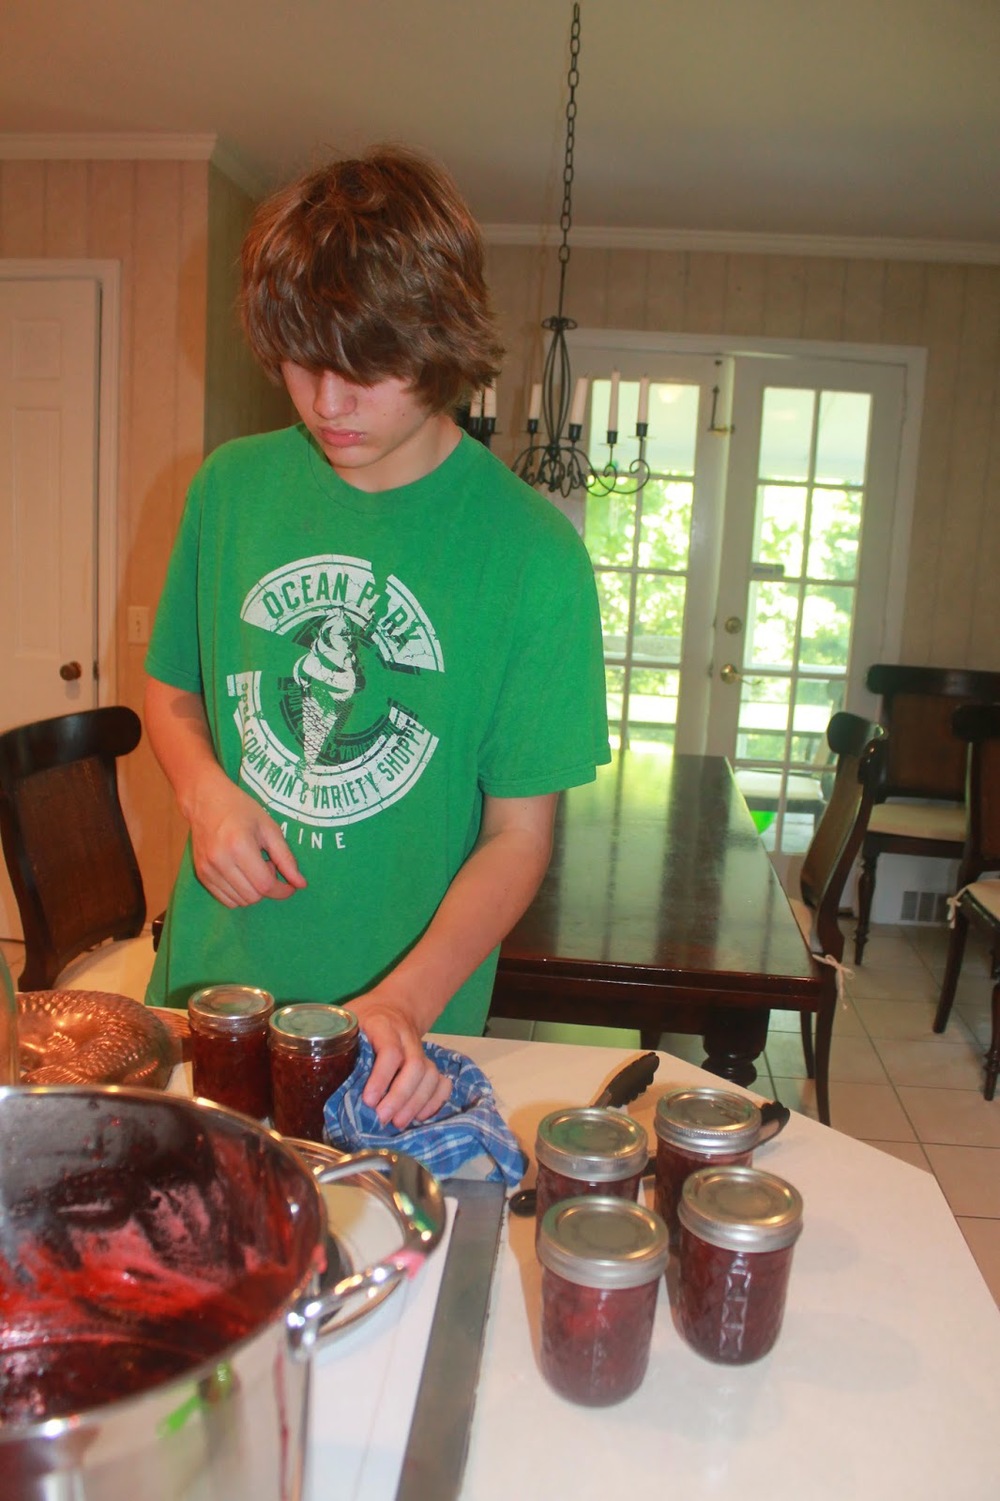
Making jam is child's play! Here my 15 year old helps me can the hot jam.


I think this is what scared me the most... the boiling process. I thought if this was not done properly the result would be automatic botulism. I was wrong. If the jars don't seal shut it simply means they need to be refrigerated. I felt a lot better knowing I was not going to accidentally poison anyone... though, I've been considering Botox recently ;)

It is important that the jars are hot so that they do not crack when pouring the hot jam mixture into them, hence the reason for needing two large pans. Don't have 2? Don't spend a fortune. We made a quick run out to Home Goods and got a large and gorgeous pan for practically nothing at all. 


DIRECTIONS:

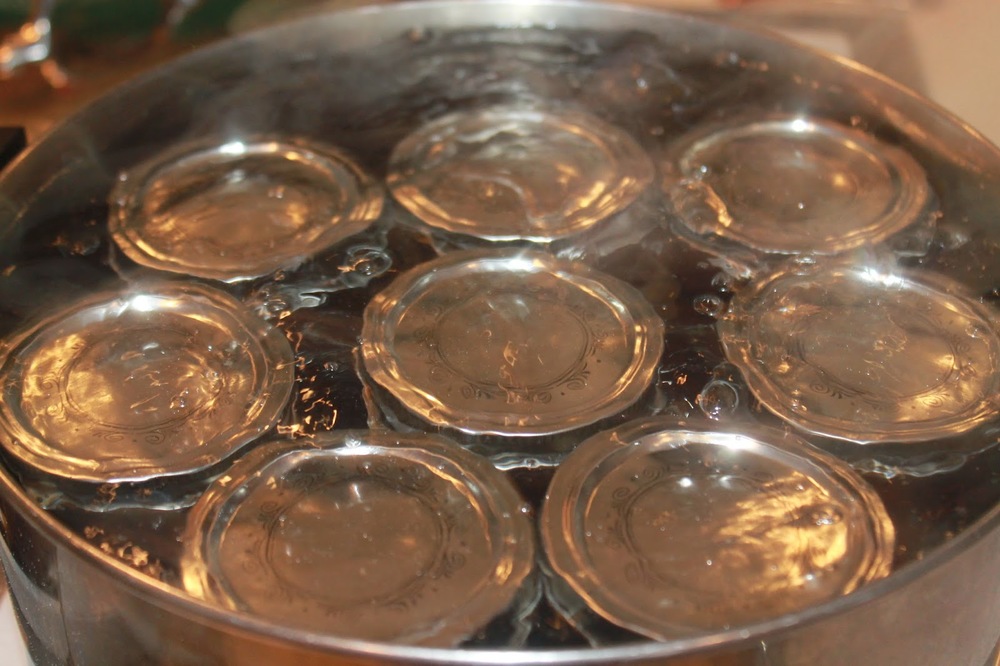
1. In a large pot that is large enough to hold 8-10 jam jars, bring water to a rolling boil, then turn down to simmer. Heat jars and lids until ready for use. Do not boil. Set bands aside.

2. Smash strawberries in a large bowl or on rimmed cookie sheets, then combine strawberries and lemon juice in a 6- or 8-quart saucepan. Gradually stir in pectin. Bring mixture to a full rolling boil that can not be stirred down, over high heat, stirring constantly.

3. Next add the entire measure of sugar, stirring to dissolve. Return mixture to a full rolling boil. Boil hard 1 minute, at minimum, stirring constantly. Remove from heat. Skim foam if necessary.

4. Carefully spoon or ladle hot jam into hot jars leaving 1/4 inch head-space. Wipe rim. Center lid on jar. Apply band until fit is fingertip tight.

5. Process in a boiling water canner for 10 minutes, adjusting for altitude. Remove jars and cool. Check lids for seal after 24 hours. Lid should not flex up and down when center is pressed.
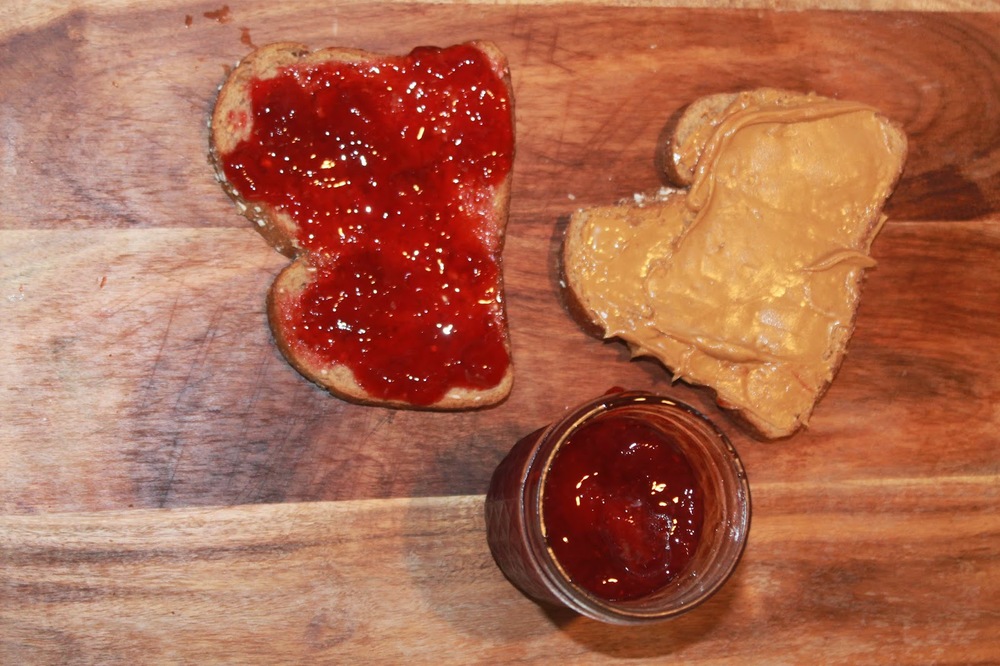
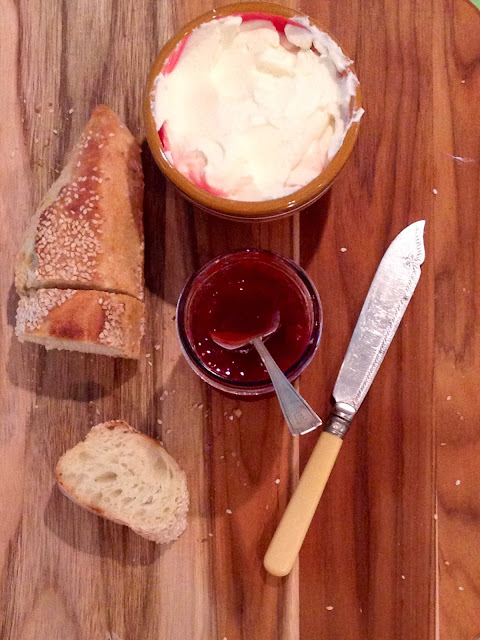
6. When cooled and refrigerated, several hours at least, spread on to some homemade bread, or do as my kids did and make your favorite sandwich!


Slow + Simple :: How to make delicious homemade bread without a breadmaker


For years I've wanted to make homemade bread - not a quick bread and not a bread-machine bread, but a good old fashioned loaf that's made of simple, basic ingredients - flour, yeast, water, salt... A loaf that has substance and crunch and chew. My problem was two-fold: I was afraid and I am surrounded by some incredible boulangeries, some of the best around.

But in my own mission to try all those things I have wanted to try, take chances and conquer my fears, I decided I ought to try my hand at bread baking. I searched around for a recipe that seemed easy and fairly straightforward. The Kitchn seemed to have just the recipe was just what I was looking for. And so with the aid of my 15 year old daughter, we set out on an adventure!

We did what we were told... and then we botched it up and forgot a step... We continued on nonetheless...Our dough seemed a little sticky and I knew enough to slowly add flour to my mixture. Eventually it seemed perfectly pliable and less like glue... We tossed it into a bowl, covered it up and set it aside. I was amazed and thrilled when, a couple of hours later, I saw how much it had risen. I continued along, and decided that instead of a large loaf we would make large dinner rolls... We placed the roundish balls into the oven for about a half an hour... What emerged were little round bits of perfection... crusty, chew, airy, perfect!

We let the bread cool but too impatient to wait until dinner, we brought out our home-made butter and had a perfectly slow + simple home made snack.

Here is the recipe via The Kitchn - I've incorporated my own notes.

What You Need:

Water - 3 cups total
Yeast - 1 teaspoon total
Flour - 6-7 cups total
Salt - 1 Tablespoon

Equipment:
Large Mixing Bowl - We mixed the dough in our KitchenAid mixer, with paddle for bread on slow.
Spoon
Baking Pans (optional) - We used 2 parchment lined cookie sheets
Baking Stone (optional)

Instructions:

1. Make a Poolish (Optional) - In a small bowl, combine 1/2 cup of water, 1/2 teaspoon of yeast, and 3/4 cups of all-purpose flour. Mix it for a few minutes, until it forms an elastic and smooth batter. Cover and let this sit for 2-10 hours. It will look like the picture above when it's ready. - We did NOT make the poolish.
Skip this step if you don't have time, but it's an easy way to add flavor and good texture to your bread. It's also a little insurance to make sure the dough rises! If you skip it, just add the ingredients into the main dough.

2. Measure the Water - Measure 2 1/2 cups (or 20 ounces) of water into a large bowl.

3. Measure the Yeast - Add a half teaspoon of yeast to the water.

4. Let the yeast sit in the water until it has dissolved. Don't be concerned if you don't see any bubbles at this point.

5. Add the Poolish - If you made a poolish, add it into the bowl now. - We skipped this step.

6. Stir the water, yeast, and poolish together until the poolish is dissolved into the water. You might see some bubbles and foam, but don't be concerned if you don't. - We did see the bubbles
7. Add the Flour Add 1 cup of flour.

8. Stir until a thick batter is formed.

9. Stir in 1 tablespoon of kosher salt. Salt can inhibit the growth of the yeast, so it's good to add a cup of flour first to give the yeast a little protection and then add the salt. We used sea salt

10. Add 4 more cups of flour and stir until the dough is too stiff to stir anymore. It's ok if there's still some loose flour left in the bowl that hasn't been incorporated into the batter.

11. At this point the dough will look shaggy and be very sticky.

12. Knead the Dough Sprinkle a little flour on your work surface and scrape your dough on top. Begin kneading, adding up to another cup of flour if the dough is very sticky. - We had to add more flour, small bits at a time until the consistency was right.

13. The dough is finished kneading and ready to rise when it springs back when you poke it, if it holds its shape in your hands, or if you can form a "window pane" without it breaking (as in the picture above)

14. Put it in a large oiled bowl and let the dough rise until doubled in size, 1-2 hours. We forgot to add oil to the bowl!

15. Shape the Loaves - Sprinkle a little flour on your work surface and turn the risen dough out on top. Divide the dough into two pieces and shape the dough into round loaves or sandwich loaves as desired. Let these loaves rise until they've nearly doubled in size, about 1 hour. We forgot this step and placed our dough right into the oven!!
16. Bake the Loaves - Preheat the oven to 450Β°. Quickly cut a few slashes 1/2-inch deep into the tops of the loaves with a serrated knife and place them in the oven. Round loaves should be baked on a baking stone while sandwich loaves in baking tins can be baked right on the oven rack.

17. Bake for 30-40 minutes until the loaves have developed some color on the crust, sound hollow when tapped on the bottom, and the inside registers 190Β° on an instant-read thermometer. Let the loaves cool before slicing into them. We baked our smaller rolls for about 20 minutes and even without letting the dough rise before placing it in the oven, the bread came out perfectly!


Slow + Simple :: How to Make Homemade Butter in 3 Easy Steps


In advance I would like to apologize for the quality - or lack thereof - of the photos. The following started as fun projects to entertain myself and the children... they turned out to be so much more. Over the past couple of weeks my children and I have been enjoying a perfectly quintessential summer... swims in the pool, afternoons at the beach with friends, gardening, strawberry picking, making homemade jam, bread and butter... 

The latter three happened almost by accident. I have always wanted to make jam but the process always terrified me. After hearing from so many how easy it is to make I decided to give it a try. With about 10 pounds of freshly picked berries we needed a means to use them all up. The jam was such a success that we then decided to try our hand at bread. Something else I have always wanted to do - sans bread machine - and yet too scared to... and logically what goes best with homemade bread? Butter, naturally. Oh it wasn't that we had no butter in the house. Butter is a staple that we almost never run out of but I thought that while we were making our own bread and jam which we ought to make our own butter. And really, there's absolutely nothing in the world that is easier to make. All you need is some heavy whipping cream and some sea salt... and maybe some herbs... 

Today I will tell you how to make butter, tomorrow the jam and Thursday the bread and by the weekend you will have everything for a perfectly slow + simple homemade petite dejeuner!

Ingredients:
1 pint of heavy whipping cream
3/4 tsp sea salt - optional
1/2-3/4 tsp Herbes de Provence or Italian Seasonings - optional

What you will need:
2 - 3 airtight jars (We used canning jars. Baby food jars work well too.)
Spatula
Ceramic dishes or ramekins

How to make butter:

1. Pour cream into jars, distributing evenly, filling about 3/4 to the top. Securely add lid to the top of the jars.

2. Shake jars with vigor for 7 - 15 minutes depending on the size of the jars. (Less time for smaller jars and more for the larger jars.) 
As you shake you can feel and hear the cream start to solidify. When the jar feels as though nothing is shaking inside any longer, open it up and take a look. You should see a light, pale yellow mixture to the sides of the jar with a hollow center. (See photo below)

3. When the mixture is no longer runny, but semi firm and airy, you can transfer the butter to a ceramic bowl and add your sea salt. Then, if desired, remove some of the salted butter and place it into another bowl adding the herbs, even garlic or garlic powder if you like. Season to taste.

1. How butter will look in the jar when it's done

2. Transfer butter to a bowl and add sea salt, if desired

3. Then add other seasonings such as Herbes de Provence, if desired.


And then, voila et bon appetit!

Note: This butter is great on bread, but not great for cooking.